NetSupport School Name & Connectivity Server
Introduction
The Name & Connectivity Server is a central server that handles all client connections. It registers all the IP addresses, MAC addresses and hostnames of the client machines.
Maintaining the latest information of all the client machines avoids issues with DHCP Lease Times or incorrect DNS resolutions.
Each Tutor machine populates their class room via the Name & Connectivity gateway and guarantees an instant connection to all client machines.
This allows for a consistent, hassle free environment.
Installation of the Name & Connectivity Server is a simple process as outlined in this guide.
Name and Connectivity Server installation
The Name and Connectivity Server can be installed to a central location, for example, a server.
To perform a fresh installation:
· Run the Setup wizard.
· Select a custom install.
o Select the Name and Connectivity Server.
· This will install the Name and Connectivity Server.
To install the Name and Connectivity Server to an existing NetSupport installation:
· Run the Setup wizard
· Select modify to change the installed features.
o Select the Name and Connectivity Server.
· This will install the Name and Connectivity Server.
.jpg)

NetSupport Gateway Configuration Utility
Initial setup for the Name and Connectivity Server can be made here.
The Configuration Utility appears after installation or can be accessed by right clicking the tray icon.
General Tab
.jpg)
Under the General Tab
· Define the listening port, this must be allowed at the firewall.
· The Default Port is 443, it is recommended to use 1443 or an alternative port number.
· All other settings can be left as default
Keys Tab
.jpg)
Under the Keys tab.
· Click Add
.jpg)
· Set a password that will be used by all machines to connect to the gateway.
· Click Ok
Licenses Tab
.jpg)
Under the Licenses tab
· By default the license file will be automatically detected if it was provided during the installation
· Click Ok
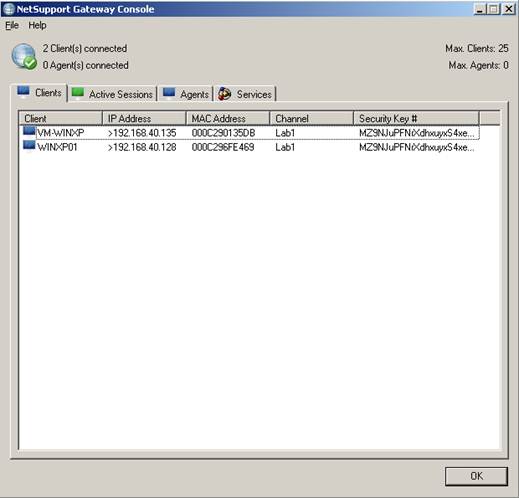
The NetSupport Gateway Console appears as below:
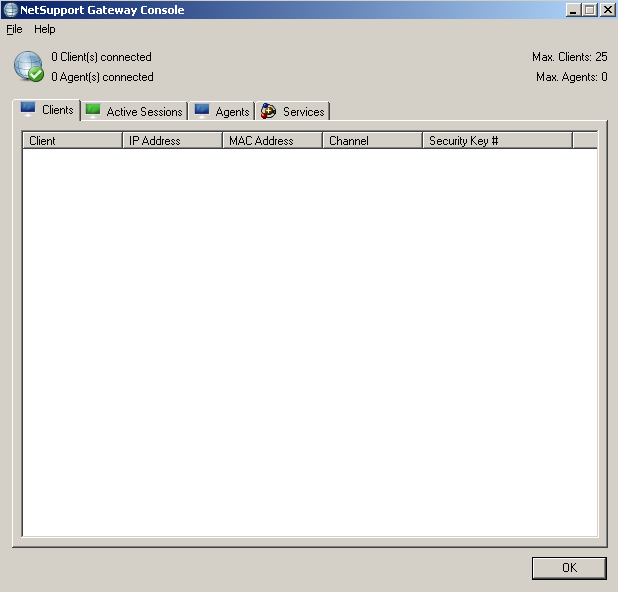
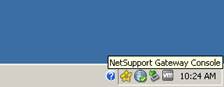
The NetSupport Gateway Console can be located in your tray icons bottom right of screen.

· Double clicking will open the console
Configuring the Tech Console to connect to the Name and Connectivity Server
Within the Tech Console navigate to:
· Admin > Configuration
This will open the Settings for Configuration: NetSupport Tech Console:
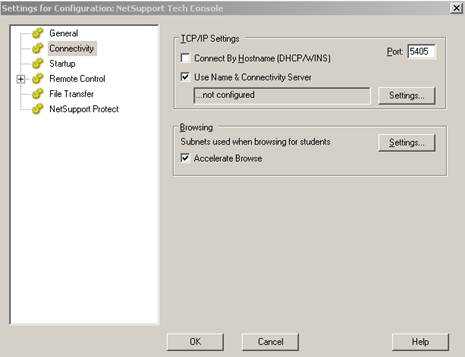
As shown above:
· Select Connectivity from the left hand pane
· In the right hand pane check the Use Name & Connectivity Server checkbox.
· Click Settings.
This will bring up the following options below:
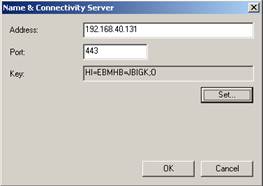
As shown above input the:
· IP address of where the Name & Connectivity Server is located.
· Port number.
· Set the Gateway key
o This is the same key that was set in the initial configuration.
· Click Ok twice.
Configuring the Tutor Console to connect to the Name & Connectivity Server
Within the Tutor Console navigate to:
· School > Configuration
This will open the Settings for Configuration: NetSupport School:
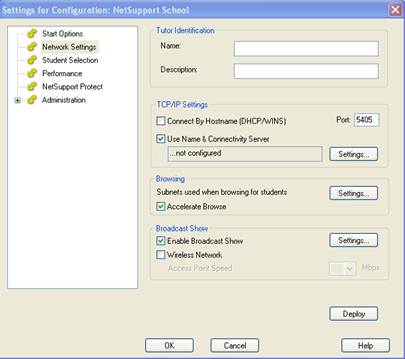
As shown above:
· Select Network Settings from the left hand pane.
· In the right hand pane check the Use Name & Connectivity Server checkbox.
· Click Settings.
This will bring up the following options below:
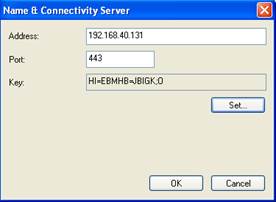
As shown above input the:
· IP address of where the Name & Connectivity Server is located.
· Port number.
· Set the Gateway key
o This is the same key that was set in the initial configuration.
· Click Ok twice.
Configuring the Client machines to connect to the Name & Connectivity Server
Open NetSupport School Deploy by navigating to:
· Start Menu > All Programs > NetSupport School > NetSupport School Deploy
Within the Deployment tools we will deploy a new client configuration file.
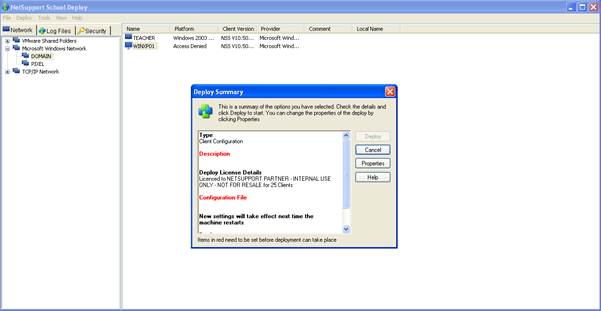
As shown above:
· Navigate your Microsoft Windows Network and highlight all the machines you wish to deploy the new client configuration file to.
· Right click on selection > Deploy > Client configuration
· In the Deploy Summary click on properties.
This will open the Client configuration properties below:
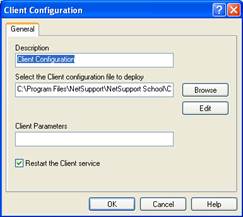
As shown above:
· Click browse to locate client32 file. This is found in the NetSupport installation directory.
· Default directory for 32bit installations, C:\Program Files\NetSupport\NetSupport School.
· For 64bit installations, C:\Program Files (x86)\NetSupport\NetSupport School.
· Click edit to edit the contents of the file.
This will open the NetSupport School Client Configurator:
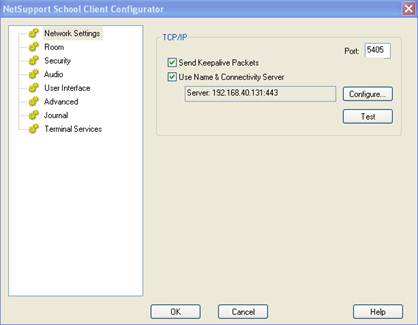
As shown above:
· Select Network Settings on the left hand pane.
· In the right hand pane check the Use Name & Connectivity Server checkbox.
· Click Configure.
This will open the configuration properties below:
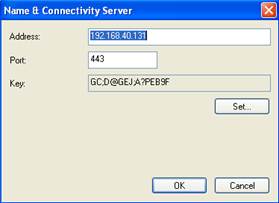
As shown above input the:
· IP address of where the Name & Connectivity Server is located.
· Port number.
· Set the Gateway key
o This is the same key that was set in the initial configuration.
· Click Ok three times to return to the Deploy Summary

Within the Deployment Summary:
· Click Deploy.
This will deploy the newly configured client32 file to all the required machines.
All machines will now connect via the Name & Connectivity Server as shown below.