Summary
We often get asked if you can send messages to an OU (Organisational Unit) instead of a list of computers.
This would assist with hot desking.
Resolution
To change the settings and allow this to work we are required to apply some group policy to the OU's.
This guide is targeted towards Windows 2008.
- Click 'Start' -> 'Administrative Tools' -> 'Group Policy Management' (Alternatively gpmc.msc in the run menu)
- Navigate to the OU you would like to send notifications too.
- Right Click and select "Create a GPO in this domain, and Link it here..."
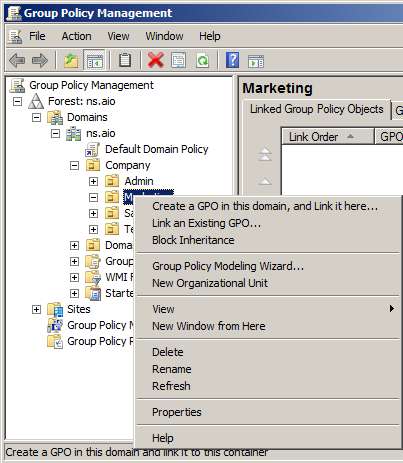
- Enter a name for your new GPO eg:(NetSupport Notify - Marketing)
- Right Click on your new Policy and select 'Edit'
- Under 'User Configuration' Expand 'Policies'
- Right Click on 'Administrative Templates' and select 'Add/Remove Templates...'
- In the dialog that appears select '
- Add...'
- Navigate to the installation directory "C:\Program Files (x86)\NetSupport\NetSupport Notify"
- Select the NetSupport_Notify_User.adm file and select Open
- Click Close
- Expand 'Administative Templates'
- Expand 'Classic Administrative Templates'
- Expand 'Notify Agent Configuration'
- Select 'Agent Configuration'
- In the right hand pane, edit "Department Details"
- Select 'Enable' and fill in your Department name.
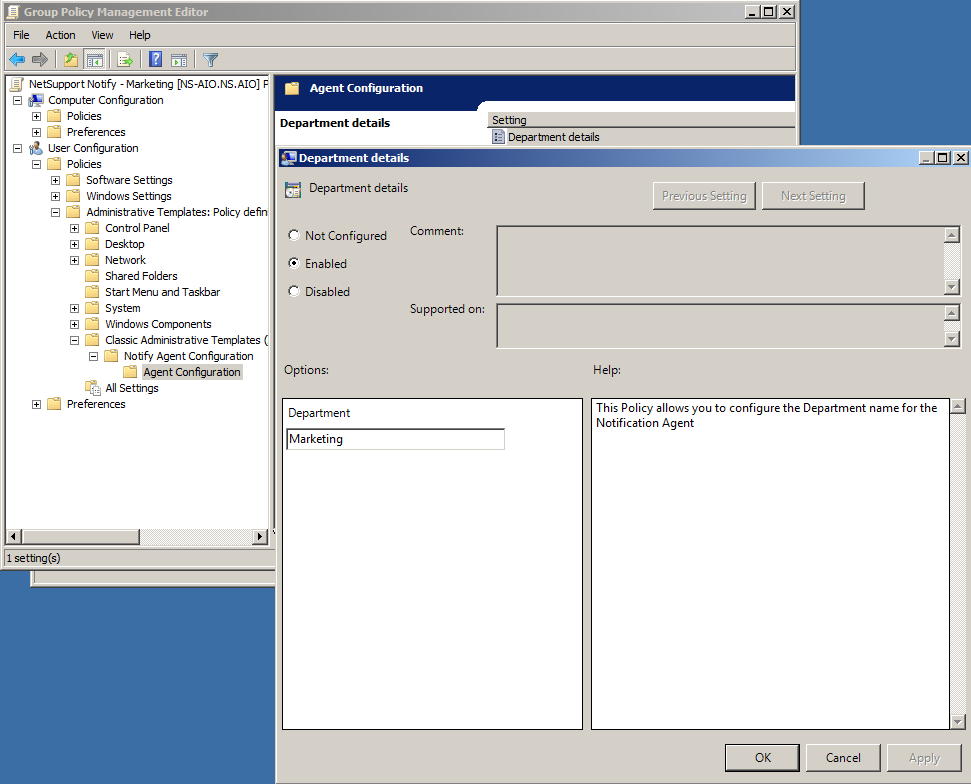
- Select Ok
- On your Clients/Users within the OU, Open Command Prompt
- Type: gpupdate /force
Alternativly you can wait for your machiens to pick up the group policy on their next login.
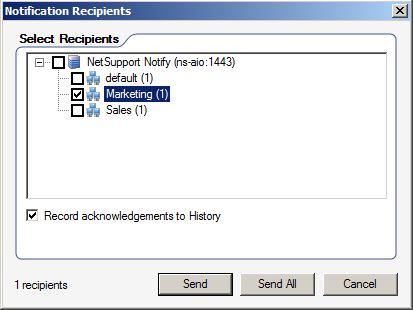
You will now be able to send notifications to your OU groups.